
Planting
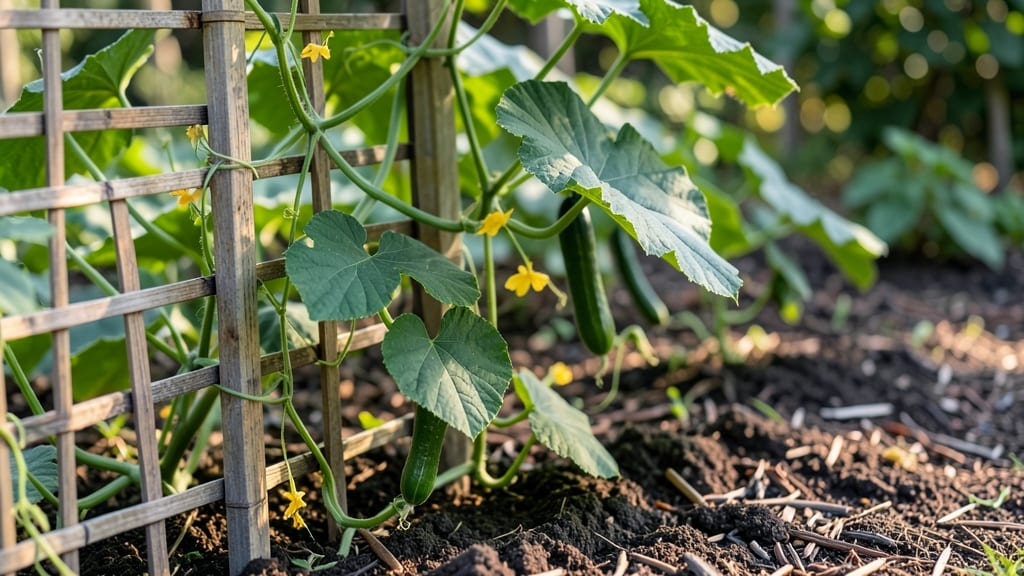
Watching cucumbers grow from a tiny seed to a sprawling vine is like witnessing nature's own time-lapse magic. 🌱 The first true leaves appear within 10-14 days of planting, but the real transformation happens over the next 6-8 weeks—when vines stretch, flowers bloom, and cucumbers swell.
I've tracked this journey for years, and the key to speeding up milestones is simple: consistent warmth, moisture, and sunlight. Start seeds indoors 3-4 weeks before last frost, then transplant when soil hits 60°F.
Within 21 days of germination, you'll see the first tendrils reaching for support—proof your cucumbers are hungry for growth. By week 6, you'll have a thriving vine with 10+ leaves and the first male flowers (the ones with long stems).
These are nature's way of saying, "The real show is coming soon." The first cucumbers appear 50-60 days after planting, and with proper care, you'll harvest 1-2 per week all summer long. This method works for both bush and vining varieties, though trellised plants produce straighter, cleaner cucumbers. The secret?
Staying ahead of the growth curve with consistent watering and occasional fertilizer boosts.
📚 In This Guide
- What you need
- Instructions
- Tips and common mistakes
- Wrapping up and next steps
What you need
- ● 4K or High-Resolution Camera: A DSLR (e.g., Canon EOS Rebel T7i) or mirrorless camera (e.g., Sony Alpha A6400) with manual settings. Pro tip: Use a camera with a remote shutter release or intervalometer for hands-free shooting!
- ○ Tripod or Sturdy Mount: A heavy-duty tripod (e.g., Manfrotto Compact) to keep the camera stable. Optional: Add a ball head for easy adjustments.
- ● Intervalometer: A device like the Vello ShutterBoss to automate shots every 5–60 minutes, depending on growth speed.
- ● Power Source: Extra batteries (at least 2) or a portable power bank (e.g., Anker PowerCore) for long shoots.
- ● Memory Card: A fast SD card (128GB+) (e.g., SanDisk Extreme Pro) to handle 4K footage.
- ● Cucumber Seeds: Choose fast-growing varieties like ‘Straight Eight’ or ‘Armenian’ for quicker time-lapse results. Buy 3–5 seeds for redundancy!
- ● Growing Container: Option 1: A 5-gallon pot (18–24 inches deep) with drainage holes.
- ● Option 2: A raised garden bed (minimum 12” deep) for larger setups.
- ● Potting Mix: A lightweight, well-draining mix (e.g., FoxFarm Ocean Forest) or a 50/50 blend of potting soil + perlite.
- ● Fertilizer: A balanced organic fertilizer (e.g., Fish Emulsion 5-1-1) or slow-release granules (e.g., Osmocote).
- ● Support Structure: Trellis or Cage: A 5–6 ft tall trellis (e.g., Bush Bean Trellis) to guide vine growth vertically.
- ● Twine or Soft Ties: For securing vines as they grow.
- ● Natural Light: A sunny windowsill (6+ hours of direct light) or a grow light (e.g., Samsung LM300) for indoor setups.
- ● Weather Protection: A clear plastic dome or greenhouse tent (e.g., Pop-Up Greenhouse) for outdoor shoots in variable conditions.
- ● Humidity Tray: A shallow tray with pebbles + water to maintain moisture, especially in dry climates.
- ● ND Filters: For adjusting exposure in bright conditions without changing aperture.
- ● Wireless Remote: To trigger shots from a distance (e.g., Nikon ML-L7).
- ● Time-Lapse Software: LRTimelapse or Adobe Premiere Pro for post-processing.
- ● Backup Camera: A secondary phone or action cam (e.g., GoPro Hero 11) for redundancy.
How to document cucumber growth milestones for a 4K time lapse
Capture the full journey from seed to vine with this precise method—perfect for high-definition footage.
🌱 Step 1: Plant Seeds and Track Initial Germination
Start by sowing cucumber seeds ½ inch deep in moist, well-draining soil. Place your planting container near a south-facing window or under a grow light to ensure 14+ hours of light daily. Germination typically occurs within 5-10 days, but keep the soil consistently moist—not soggy—to prevent rot. Use a small marker to label each seedling with the planting date, which helps track progress accurately.
Watch for the first signs of sprouting: tiny green shoots pushing through the soil. This is your cue to begin documenting. Film the soil surface daily with a macro lens to capture the delicate unfolding of the seed leaves (cotyledons). I like to use a tripod for stability and set a reminder to shoot at the same time each morning—consistency is key for smooth time-lapse footage.
🌿 Step 2: Monitor Early Leaf Development and Vine Growth
Once the first true leaves appear (usually 7-10 days after germination), your cucumber plant enters its rapid growth phase. Focus your time-lapse on the stem and leaf development, capturing how the vine elongates and the leaves unfurl. Use a slow shutter speed to blur any movement from wind or watering, keeping the footage crisp.
Here’s the thing—cucumbers grow fast, so adjust your filming frequency. If you’re shooting manually, aim for every 2-3 hours during daylight to avoid missing critical stages like the first tendril formation (a sign the plant is ready for support). I’ve found that using a remote shutter or intervalometer on your camera automates this process perfectly, ensuring no growth spurts are missed.
☀️ Step 3: Capture Flowering and Fruit Set in High Definition
When your cucumber plant reaches 4-6 weeks old, you’ll notice the transition to flowering. This is the most visually dynamic phase—male flowers (with long stems) appear first, followed by female flowers (with tiny cucumbers forming at the base). Film this stage in 4K resolution to highlight the intricate details of pollination and fruit development. Use natural light during the golden hours (early morning or late afternoon) for the best color saturation.
Pay special attention to the first fruit set, which typically occurs 2-3 weeks after flowering. The cucumbers will start as small, bumpy growths and swell rapidly. To avoid distortion in your footage, keep the camera at a consistent distance—around 12-18 inches away—and use a macro lens to emphasize the texture changes. I’ve learned to avoid watering right before filming, as droplets can obscure the details you’re trying to capture.
✂️ Step 4: Document Vine Maturity and Harvest Readiness
By 8-10 weeks, your cucumber plant will be at peak maturity, with vines sprawling and fruits reaching harvest size. Focus your time-lapse on the vine’s overall structure, including how the leaves yellow and drop as the plant redirects energy to fruit production. Harvest cucumbers when they’re 6-8 inches long and firm to the touch—this ensures they’re at their crispest and most flavorful.
For the final stages, include footage of the harvesting process itself: gently twisting cucumbers off the vine to avoid damaging the plant. This adds a practical, real-world element to your time-lapse. Store the footage in sequential order, labeling each clip with the date and growth stage. You’ll end up with a stunning, high-definition record of the entire cucumber lifecycle—from a tiny seed to a thriving vine laden with produce.
Tips & tricks for perfect cucumber plant time lapse
These pro-level tips will help you capture the most stunning, high-definition footage of your cucumber's journey from seed to harvest.
Lighting is Everything: For Step 1 and Step 2, use a ring light or softbox positioned at a 45-degree angle to eliminate harsh shadows on your seedlings. Natural light works best during golden hours (early morning or late afternoon), but supplement with artificial lighting if shooting indoors. I've found that diffusing light through a sheer curtain creates the most flattering glow for delicate new growth. The key is to maintain consistent lighting conditions throughout your entire shoot—even slight variations can create jarring transitions in your final time-lapse.
Camera Consistency is Critical: In Step 2 when monitoring leaf development, set your camera to a fixed focal length and composition. I recommend using a tripod with a remote shutter to eliminate any movement between shots. For the rapid growth phase, consider using an intervalometer to capture images automatically every 2-3 hours during daylight—this ensures you don't miss any critical development stages while maintaining perfect consistency. The same goes for Step 3's flowering phase: keep your camera positioned 12-18 inches away with the macro lens focused on the flower clusters.
Weather and Growth Rate Factors: Be prepared to adjust your filming schedule based on environmental conditions. In Step 3, when capturing fruit set, warmer temperatures will accelerate growth—you might need to increase your filming frequency to every 1-2 hours during heatwaves. Conversely, cooler weather may slow development to every 4-5 hours. I've learned to check the weather forecast and adjust my intervalometer settings accordingly. This attention to detail ensures your time-lapse accurately reflects the plant's natural growth rhythm rather than an artificial accelerated version.
Post-Processing Pro Tip: For Step 4's harvest footage, shoot in RAW format if possible to capture the maximum dynamic range of colors. This gives you more flexibility during editing to enhance the vibrant greens and rich textures without introducing noise. I typically use color grading to create a warm, inviting tone that highlights the plant's natural beauty while maintaining scientific accuracy in the growth progression. Remember to maintain consistent color temperature throughout your entire shoot—even slight shifts can make your time-lapse look unprofessional.
Pro Tips for Cucumber Plant Time Lapse
- These pro-level tips will help you capture the most stunning, high-definition footage of your cucumber's journey from...
- Lighting is Everything: For Step 1 and Step 2, use a ring light or softbox positioned at a 45-degree angle to elimina...
- Camera Consistency is Critical: In Step 2 when monitoring leaf development, set your camera to a fixed focal length a...
Frequently asked questions
Got questions about capturing the perfect cucumber plant time lapse? You’re not alone! Here are answers to the most common queries—whether you’re a beginner or a seasoned gardener fine-tuning your setup.
How long does it take for a cucumber plant to grow from seed to harvest in a time-lapse?
A cucumber’s full growth cycle (seed to vine) spans 60–90 days, but time-lapse speed depends on your settings. Most gardeners shoot 1–2 frames per hour for visible progress. For a 1-minute video, you’d need ~1,000+ frames—so plan for weeks of filming to capture germination, leafing, and fruiting!
What’s the best time of day to film a cucumber plant time-lapse?
Shoot during golden hours (morning/evening) for soft lighting and minimal glare. Avoid midday sun, which creates harsh shadows. If using artificial light, a LED grow light on a timer (12–14 hours/day) ensures consistent conditions. Pro tip: Cloudy days can actually work better for even exposure!
Can I use a regular phone or do I need a DSLR for a cucumber time-lapse?
A smartphone with intervalometer apps (like Time Lapse Pro or ProCam) works great for beginners. For sharper results, a DSLR with manual settings (e.g., Canon EOS M50) lets you adjust focus and ISO. Budget hack: Use a tripod + timer app—no fancy gear needed!
My cucumber leaves are yellowing—will this ruin my time-lapse?
Yellowing leaves (often from overwatering, pests, or nutrient deficiency) won’t stop your time-lapse, but it’ll affect the plant’s health. Troubleshoot first:
- Check soil moisture—cucumbers hate soggy roots!
- Inspect for aphids/spider mites (use neem oil if needed).
- Fertilize with balanced 10-10-10 if leaves are pale.
How do I edit a cucumber time-lapse to speed up the footage?
Use free tools like iMovie, CapCut, or Adobe Premiere Rush to adjust playback speed. For a 1-minute video of 60 days:
- Import raw footage (e.g., 1 frame/hour = 1,440 frames/day).
- Set playback speed to 24x–48x (experiment for smoothness).
- Add background music (60 BPM tracks sync well with growth!).
- Export at 1080p or 4K for crispness.
Wrapping up and next steps
Watching a cucumber plant grow from a tiny seed to a thriving vine is nothing short of magical! 🌱 This time-lapse journey reminds us that patience and care yield incredible rewards—whether you’re growing for fresh harvests or simply admiring nature’s process.
Now that you’ve got the tools and insights, why not plant your own seeds and capture the transformation in stunning 4K?
Ready to dive in? Start with a single seed, set up your camera, and let the growth unfold before your eyes. Happy gardening! 🌿